We previously looked at how to create your own Azure Process template for projects so you can customize future Azure DevOps Projects all follow the same process.
Before our team can start using the new process, we want to make some changes to it. We can start by going back to the Organization Settings > Boards and then selecting Processes and the one we created “My Better Agile”.
To start with we are going to click on the Bug Work Item (for all work items the structure is the same). At the top of the menu, you are presented with 3 options – Layout, States, and Rules.

Creating a New/Updating a Field
By clicking New Field you can create a new field or update an existing one. The same rule applies as it did for our processes. If you are going to change the functionality of an existing field, don’t update it, create a new one.
In this example, I’m going to create a new field of type integer which will add it to the form.
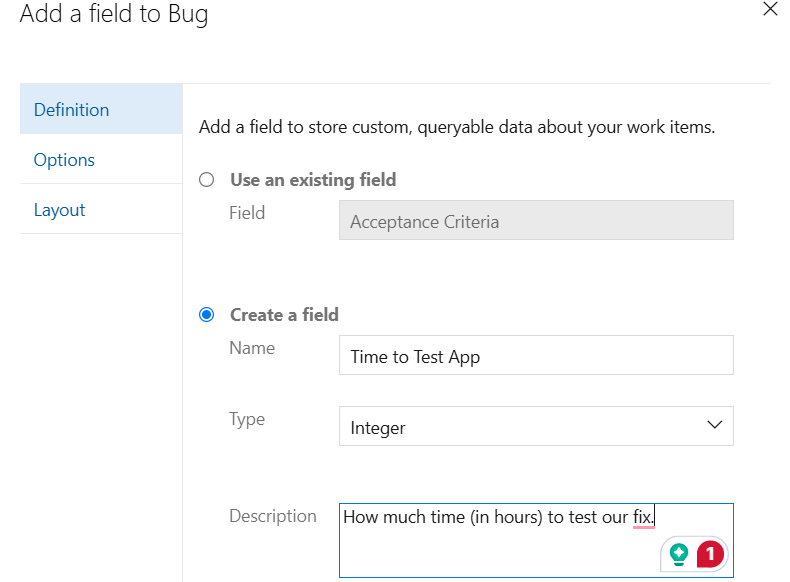
What is interesting here, is that as soon as I have placed this field on the form, there is no save or publish functionality, it will show on the form immediately.
Rules
Rules enable you to take action on the field based on conditions that happen in the system. There are many different actions and conditions you can configure, based on our scenario, when our bugs are marked as resolved, we want this field to become required to ensure time is allocated stating how long it took to validate the bug.
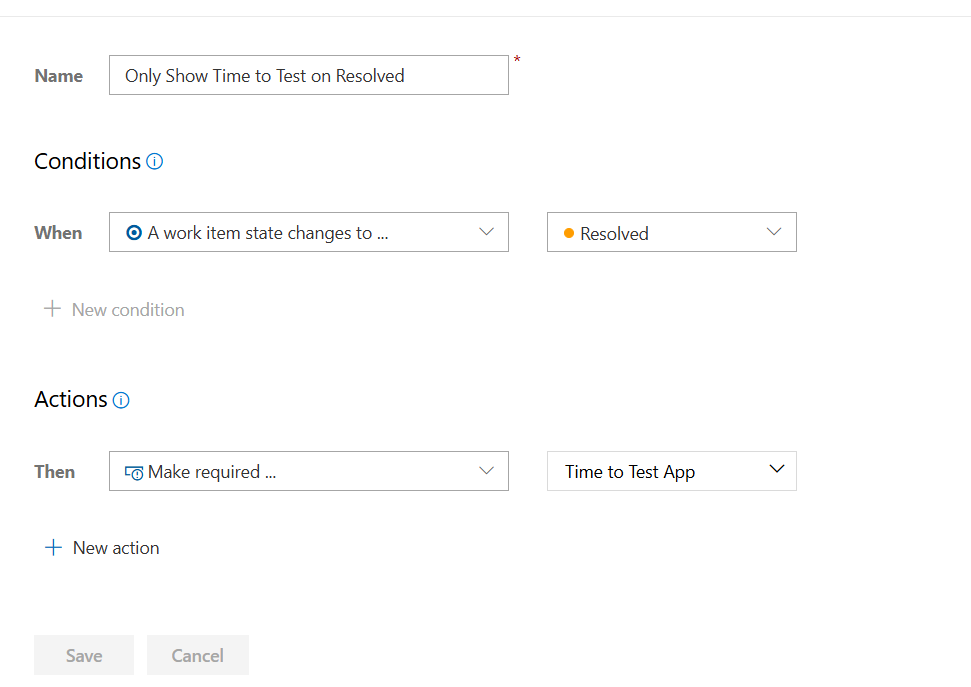
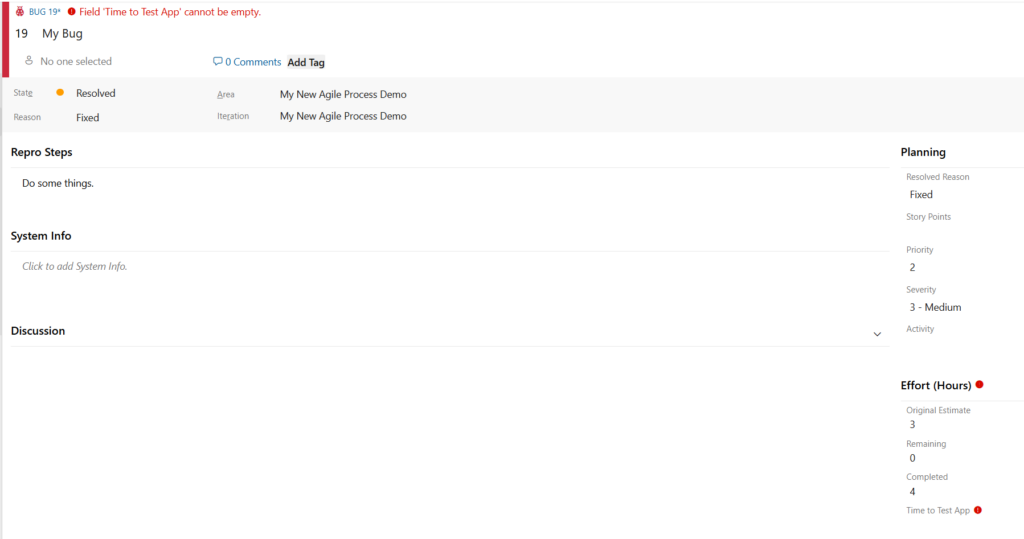
When the above rule executes, this will prevent the bug from being saved until this value is supplied.
There are many other lookup and validation options you can employ with Azure DevOps, customizing layouts and hiding fields. You can even implement your own Azure DevOps Extensions to provide more intricate fields and data embedded into the context of your application.